Creating a Graphic for a Moving Wall
Scenario: Do the following to display a moving wall in the graphic and System Browser:
- Create a wall graphic with two states
- Close

- Open

- Create a reaction to update the System Browser.
System Response when Moving a Wall | |
2 rooms | 1 room |
Floor Plan:
| Floor Plan:
|
Segment in room 17:
| Segments in one room:
|
Segment in room 18:
| |
System Browser:
| System Browser:
|
Temperature display: The room temperature is individually displayed by room. | Temperature display: The room temperature is displayed as the mean temperature of two rooms in master room 17. |
Prerequisites:
- System Manager is in Engineering mode.
- The floor plan on a floor or room is created and saved.
- In the graphic, the associated rooms are not labeled as a static element.
- The Graphics Editor is opened.
- Select Home > Element.
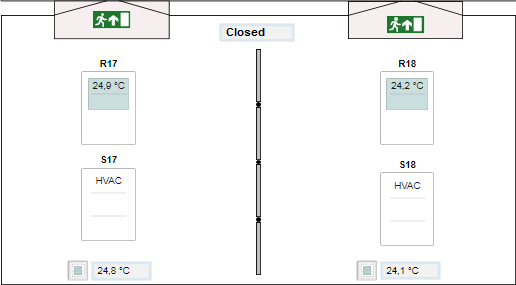
- Draw the wall for the state Closed:
- Select a Corner
 or Line
  and draw a wall
  .
.
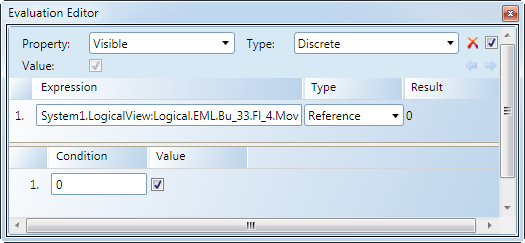
- Click the View tab and then select Evaluation Editor.
- In the System Browser, select Management View.
NOTE: Do not use the Logical View for a moving wall, since the hierarchy structure is adapted dynamically in the System Browser based on the room configuration (hidden or displayed). As a result, the object Room no longer exists in Room 18 and an engineering error message is displayed on the graphic.
- In the object structure, select Project > [Network name] \...\ Hardware > [Data point] (for example, a limit switch on the wall).
- Drag the object to the Expression column of the Evaluation Editor.
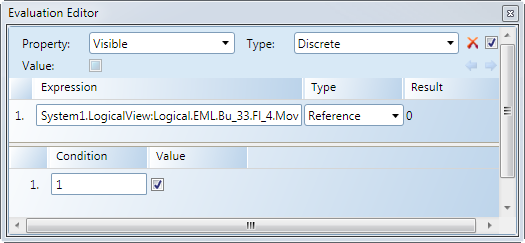
- Define the properties in the Evaluation Editor:
a. Select Property and Visible.
b. Under Type, select Discrete.
c. In the Type column, select Reference.
- In Row 1, Operation column, enter the value 0 or 1.
NOTE: The value entered is based on the control action of the contact.
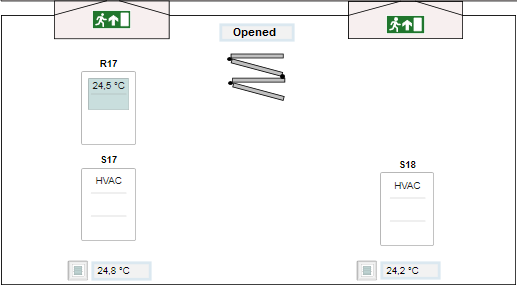
- (Optional) Draw the wall for the state Closed:
- Select a Corner
 or Line
  and draw a wall in the open state
  .
.
- Click the View tab and then select Evaluation Editor.
- In System Browser, select Management View.
- In the object structure, select the same data point.
- Drag the object to the Expression column of the Evaluation Editor.
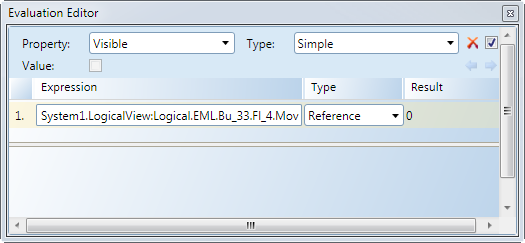
- Define the properties in the Evaluation Editor:
a. Select Property and option Visible.
b. Under Type, select Discrete or Simple.
c. In the Type column, select Reference.
- In Row 1, Operation column, enter the value 1 or 0.
NOTE: The value entered is based on the control action of the contact.
- Click Save.
Settings in the Evaluation Editor | |
Wall closed | Wall open |
Type = Discrete
| Type = Discrete
|
| Type = Simple
|

NOTE: The property Visible cannot be enabled on both graphics.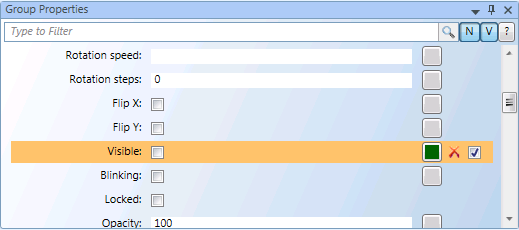
- The floor plan on a floor or room is created and saved.
- The Graphics Editor is opened.
- In System Browser, select Management View.
- Click Filter search
 .
.
- The Filter search dialog box opens.
- Open the Object type drop-down list
 .
.
- Available filter criteria are displayed.
- Select View element and select check boxes Segment and Room.
- Click Scan.
- All rooms and segments are displayed.

- You can drag a Room or Segment to the floor plan graphic.
The following description applies to two rooms, merged temporarily into one room. The example may need to be modified depending on the selected function.
- The graphics page is created.
- Information, for example, a limit switch on the wall, is available for executing the reaction.
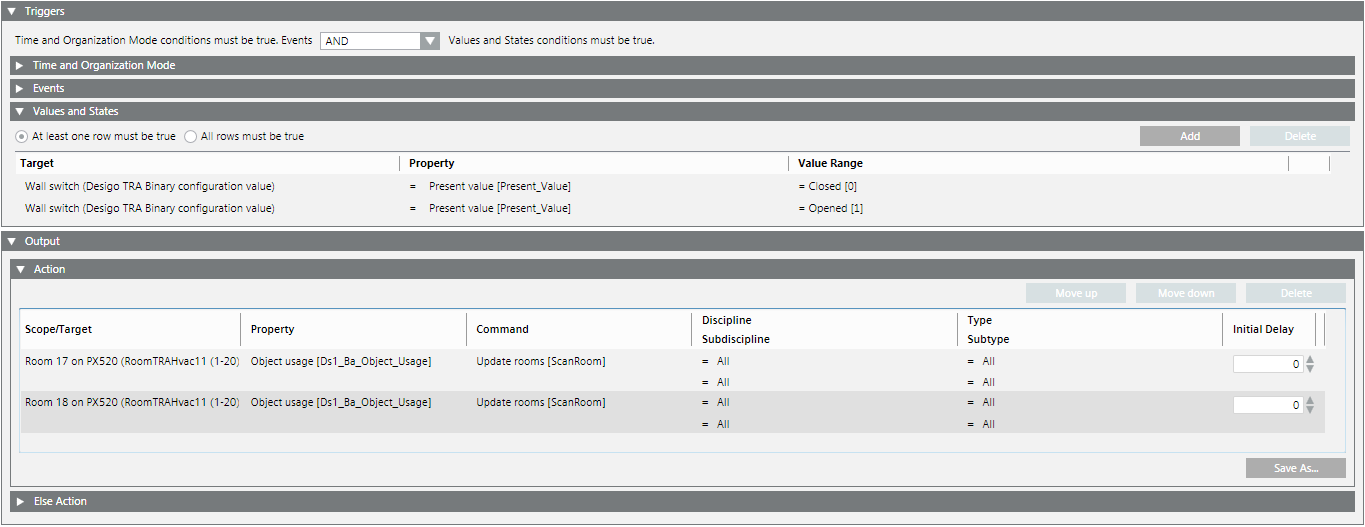
- In System Browser, select Application View.
- Select Applications > Logics > Reactions.
- Open the Reaction Editor tab.
- Open the Triggers expander.
- Open the Values and States expander.
- In the System Browser, select the data point that displays the room state (for example, a limit switch on the wall).
- Drag the data point for the Closed state to the Values and States expander.
- Define the following entries for the closed state (2 rooms):
- In the Property property, select Present Value.
- In the Value range column, select the equals sign (=).
- In the Value range column, select option Closed (0).
NOTE: Pay attention to the contact control action.
- Drag the data point for the Open state to the Values and States expander.
- The define the following entries for the open state:
- In the Property property, select Present Value.
- In the Value range column, select the equals sign (=).
- In the Value range column, select option Open (1).
NOTE: Pay attention to the contact control action.
- Open the Action > Action expander.
- Select the Room (17) and drag the Room object to the Action expander.
- Define the following entries for room object 17:
- In the Property column, select option Object Usage.
- In the Command column, select option ScanRoom.
- In the Initial delay column, enter a time in seconds [0 = immediate].
- Select the Room (18) and drag the Room object to the Action expander.
- Define the following entries for room object 18:
- In the Property column, select option Object Usage.
- In the Command column, select option ScanRoom.
- In the Initial delay column, enter a time in seconds [0 = immediate].
- Click Save
 .
.
- Create a reaction to update the System Browser.
